Friday, June 8, 2012

Fruit Spread and the Mountain Man

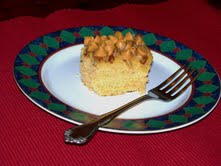
Wednesday night = breakfast night at our house.  We've been doing this for awhile now and I'm always in search of new recipes that the whole family will enjoy.  This week I broke down and made my husband's absolute favorite campfire meal-Mountain Man breakfast.  It's not hard to make-just time consuming.  Consider that your warning.  And for my Little Bit Ruby I made pancakes with the most amazing fruit spread!  I could eat it plain with a big ole honkin' spoon.  Who needs the pancake? 
Fruit Spread:
8 oz cream cheese softened
1-2 Tablespoons vanilla extract
1 Tablespoon sugar
2 heaping spoonfuls strawberry jam
1 cup fresh strawberries cut up into smaller pieces
3/4 cup banana also cut up
1 cup frozen blueberries
With your electric mixer combine Cream cheese, vanilla and sugar.  Stir in remaining ingredients.  Chill till ready to serve.  You can spread this on pancakes or waffles, serve as a fruit filled fruit dip, or great dip for cinnamon sugar chips.  The possibilities are endless.  Or you could be like me and just eat it plain with a spoon!  Num, num, num!!!
 Now onto the Mountain Man Breakfast that my cowboy of a husband loves so much.  This recipe is out of Camp Dutch Oven Cooking 101 From Backyard to Backwoods cookbook by Lodge.  This can either be made in a 12" dutch over over the campfire or in a large skillet on the stove top. 
2 lbs sausage
2 lbs frozen hash brown potatoes
8 eggs beaten
2 cups grated cheese

In a large 12 inch dutch oven over a full bed of hot coals, fry and crumble sausage.  Remove cooked sausage and drain on paper towels.  Using the sausage drippings in the pan, brown potatoes, and spread them evenly in bottom of camp oven.  Place cooked sausage over the potatoes.  Pour eggs over sausage layer.  Sprinkle top with cheese.  Cook with 8 coals underneath and 16 on top for 20-25 minutes, until eggs are cooked.

Note:  I find that this meal works best if I cook my sausage then set aside.  The hash browns seem to take quite a while to cook.  Once they are done I layer the other ingredients and cook until eggs are done. I must say, though it does take time to make-it is well worth it!  Very filling!


Patriotic Wreath

Simple to make with foam craft wreath, yarn, buttons and bows.

Avocado Parmesan Chicken

This recipe is inspired by a recipe I found on Pinterest from ellenaguan.blogspot.com
When preparing for the first time I immediately made quite a few changes to suit my taste.  Here is my version.
Ingredients to feed family of 6 with leftovers:
12-14 boneless chicken breast tenders.  If you are using the bigger chicken breast you will only need 6-8 and you will need to use a meat pounder to thin them down. 
1 package Ritz crackers crumbled
3/4-1 cup Parmesan cheese
2 eggs beaten
2 avocados
onion salt
Marinara Sauce
Cheese(can be Mozzarella, Cheddar, or combo of both)

 Pre-heat oven to 425 degrees.  Combine cracker crumbs and Parmesan cheese in medium bowl.  Dip Chicken in egg followed by cracker mixer  then place on cookie sheet that has been sprayed with cooking spray.  Place in oven cooking for 17 minutes.
 Meanwhile slice avocados and sprinkle with onion salt.
 Remove chicken from oven.  Spoon Marinara sauce over the chicken breasts followed by avocado slices.  Finally top off with cheese.  Continue cooking for another 3-5 minutes.  Remove from oven and serve.
I served mine with a side of rice along with a Romain salad topped with fresh green onions and strawberries. 

Note:  I am a busy mom of 4 and sometimes I don't have time to do all these steps.  I have made this dish using the Panko breaded chicken tenders that I purchased from the freezer section at Costco.  Just make sure you adjust your oven temp and cooking times according to the package. This is a great option if you find yourself in a bind for time but still want more of a gourmet dinner for your family!


Baked Chimis

Imagine that, another Mexican dish!  These are our absolute favorite!!  The great part about this recipe is that it makes a big batch(2- 9x13pans) so one pan can go in the freezer.  Or what I normally do is give one as a meal for someone in need.   
1 1/2 bags tortillas either medium or large shells
2 cans refried beans
shredded cheese(any kind will do)
2 packages Spanish rice
1 large can red enchilada sauce
1-15oz can tomato sauce
1-10 3/4 oz cream of mushroom soup
2 lbs meat(this can be shredded chicken, pork, or ground beef)

Cook Spanish rice and set aside.  Combine soups and sauces in large bowl and whisk together.  Cook your meat of choice.  Pour 1/3 of sauce over meat and stir.  Now you are ready to start filling tortilla shells.  This is how I layer mine:
Refried beans
Meat
Rice
Cheese
Then fold your shells...


 Place in greased pan.  Pour sauce over the top of the chimis followed by cheese.  Cover with aluminum foil.  Bake at 350 degrees for 1 hour.  If you want a crispy chimi do not cover with foil for last 30 minutes of baking.
Serve with sides of guacamole, sour cream, salsa and tortilla chips.  And don't forget your margarita!!!
Enjoy!

Thursday, June 7, 2012

Butterscotch Cake- A Guest Post

Do you enjoy church pot lucks?  I do-probably too much!  Great food, future recipes to try out at home if the cook is willing to share, and great fellowship-what could be better! 
My friend Missy has brought this wonderful cake to church twice now and both times I asked her for the recipe, then stooped to begging over email telling her this must be shared with the world-it just must!!!  Before I share Missy's cake recipe I want to tell everyone that this amazing woman is a super hero-truly she is!  A mother of five, she should wear a cape while grocery shopping and a tiara while vacuuming.  And she cracks me up!  Before I go on and on and preach a sermon titled Mama V. wife, mother, world conqueror I'll share her email containing the recipe for this fabulous cake.  As always Enjoy!


  By the way Evan, thanks for making me take pictures of that last piece of cake.  I am on a diet and I absolutely had to eat that piece after taking it out of the pan and taking pictures of it!!!  ;)  Anyway, here is the recipe:

Butterscotch Cake
I really hate to admit how embarrassingly easy this recipe is;  however, doesn't it always seem like the best things really are just that simple?  Enjoy!

1 yellow cake mix
2 eggs
1 can Thank You Butterscotch Pudding
1/3 cup sugar
1 cup chopped walnuts
1 cup Butterscotch Chips

Just a side note before you begin, my recipe calls for a can of Thank You Butterscotch pudding, which I haven't been able to find anywhere!  I ended up substituting 6 single serving cups of Hunt's Butterscotch pudding.  (They come in 4 packs, so you'll have to let your kids fight over who gets the two leftovers!) Beat together cake mix, eggs, and pudding.  Pour into a greased 9x13 cake pan.  Sprinkle on sugar and then the walnuts.  Bake according to directions on cake mix.  (I usually end up baking mine at 350 degrees for approx. 25-30 minutes - until a toothpick comes out clean.)  In the last five minutes of baking, take the cake out and sprinkle the butterscotch chips on top.  Put back in the oven and continue baking for the remaining 5 minutes. 

There are as many variations to this recipe as your imagination will allow!  It is truly one of the most moist cakes I have ever made, while still being light and not too dense.  If you're a chocoholic, you could do a chocolate cake mix and chocolate pudding with chocolate chips.  You could try a lemon cake mix with lemon pudding perhaps, maybe a yellowcake mix with pistchio pudding and chopped pistachios on top - I think you get the idea...be creative!

Tuesday, June 5, 2012

Quesadilla Bar

Mexican food is a favorite in the Westra House!  This last weekend we decided to have a build your own quesadilla bar so everyone could make theirs just how they like it.  Kurt's of course contained every spice he could find in our cupboards paired with a HUGE ice tea to help with the burn on the way down.  YIKES!!!!  Here are some of our favorite combos:

Traditional Quesadilla:

refried beans
shredded chicken
cheddar cheese
olives
tomatoes
onions


Pizza Quesadilla:

thin layer of tomato sauce
sprinkle of Italian seasoning
sprinkle of oregano
sprinkle of Parmesan cheese
mozzarella cheese
Canadian bacon
pepperoni


BBQ Chicken Quesadilla:

thin layer of BBQ sauce(I use Sweet Baby Ray's)
grilled chicken cut into thin strips
Pineapple tidbits or grilled pineapple rings
cheddar cheese
sweet onion-grilled optional
optional green pepper

Kurt's 5 alarm Quesadilla:

everything in traditional quesadilla
jalapenos
hot sauce from hell
red pepper flakes

All served with sides or sour cream, salsa, and guacamole.
Great for a quick and easy lunch or fun family dinner!
ENJOY!

Tuesday, April 17, 2012

Grammy's Cookies (Whoopie Pies)

My husband has been trying to get me to make these for almost 12 years.  Unfortunetly the recipe had been lost and no one in the family had it.  I remembered writing it down when we were first married but couldn't locate my copy.  That is until about a month ago when I was reorganizing my cookbooks and recipe cards.  I myself had never had a Grammy's cookie until today and let me tell you my friends these are A M A Z I N G!!!  Grammy obviously knew what she was doing because these are the most moist whoopie pies I have EVER had!!! After finding out these little beauties were in the house, Kurt decided he better make an appearance at home for lunch.  I hope you like them as much as he does!!  Enjoy with a shot of milk!


Grammy's Cookies
1/2 cup butter softened
1 cup sugar
1 egg room temp
1 cup sour cream
1 tsp vanilla
1/2 cup cocoa
1 1/4 cup flour
1/2 tsp salt
1/2 tsp baking soda

Cream butter, sugar, egg, vanilla, and sour cream in eletric mixer on medium speed.  Add cocoa, flour, salt, and baking soda.  Drop by teaspoon or small cookie scoop on greased cookie sheet.  Bake at 350 degrees for 11 minutes.  Let cool on rack before frosting

Butter Cream Frosting-Betty Crocker
3 cups powdered sugar
1/3 cup butter softened
1 1/2 tsp vanilla
1-2 TBSP milk

NOTE:  I baked these cookies in a convection oven so you may have to adjust your baking time if you are baking in a standard electric.

Thursday, April 12, 2012

Five Alarm Pizza

My husband likes everything spicy-that's why he married me!  HA HA HA, I crack myself up!! Anyhoo, every Friday for dinner we have homemade pizza.  I roll out 6 crusts and everyone gets to put what ever they want on their personal pizza.  My husband has been bragging about his concoction so I thought I would share it with all of you.  First the crust:
Pizza Crust
(Double recipe for 2 regular sized pizzas)
2 Cups Flour
2 tsp baking powder
1 tsp salt
2/3 cup milk
1/4 veg oil
Stir together and roll out on floured surface.
Once rolled top with tomato sauce.  Sprinkle with Italian seasoning, oregano, and Parmesan cheese.  Then top with Mozzarella cheese followed by the toppings of your choosing.  Bake at 425 degrees for 15-20 minutes.

Five Alarm Pizza
Toppings included in order stacked on crust:
Pepperoni
Canadian Bacon
Sliced green pepper
Sausage
Bacon
Olives
Jalapenos
Red pepper flakes
Pineapple
Sprinkled Mozzarella on top
Hot Sauce from Hell drizzled over each slice right before eating

Enjoy if you dare!

Tuesday, April 3, 2012

Spring Wreath

Beautiful Spring Wreath!

Supplies Needed:
12 in diameter metal craft ring(Joannes $2-$3)
15 different fabrics cut into 1 in by 6 in strips(I used about about 165 strips total)
I raided my mom's fabric cabinet and used scrap fabric for all my strips.  The fabric I chose reflected the 1930's and 1940's so very fun and retro!
1 ribbon for hanging 
1 hook or wreath hanger for hanging

This only takes about and hour to complete-so easy!  Just tie your strips around your craft ring, bunch them up and your done!
Happy Crafting!

Saturday, March 31, 2012

Easter Nests

My mom always made these with us when we were kids, and my kids loved making them too!
They are marshmallow, peanut butter and chocolate Easter Nests with candy eggs!


Ingredients:
1 jar (7oz.) marshmallow creme (about 2 cups)
1/4 cup creamy peanut butter
2 tbsp melted butter
1 can (5 oz.) chow mein noodles (about 3 cups)
1 cup chopped, Easter plain M & M's
36 - 48 Easter peanut M & M's

Directions:
Combine marshmallow creme, peanut butter, and butter.  Mix well.  
Add noodles and chopped M & M's a little at a time.  Mix well.
Prepare a baking sheet with wax or parchment paper and sprinkle powder sugar over paper.
Drop 1/3 cupfuls onto the cookie sheet.
Use your fingers to form nests.
Place 3-4 peanut M & M's into each nest.  I like to mix colors because it looks cuter :)
Place into the refrigerator to set up for at least 15 minutes.
Enjoy! 
I would love to hear what your favorite Easter treats are and if you make these, how they turn out :)
Happy cooking!


Friday, March 30, 2012

Product I love

I wanted to share with everyone one of my favorite kitchen tools.  This great little bunny helper would be a wonderful addition to any cook's Easter basket. The Prepology Bunny Design Safety Lid Lifter is not your everyday can opener.  The lids come off clean without sharp edges and it is very easy to use.  Would be great for someone with arthritis.  My kids love helping out in the kitchen and now that we have a cute little tool to do the job they argue over who gets to open the cans.  So Hop, Hop, Hippity Hop on over to QVC
 and check out all the wonderful colors they offer. 

Egg and Sausage Braid

We love breakfast for dinner and we love crescent rolls!  This recipe deliciously combines both!


Ingredients:
1 lb. sausage (I like to buy unseasoned, so I can season it myself.)
1 onion
cheese (I used american cheese)
Cholula (the best hot sauce EVER!)
1 package Crescent Rolls (I use reduced fat)

Directions:
Start cooking sausage in a large skillet.
Dice onion and add to sausage.
Add seasoning if you bought unseasoned sausage.  I use a mixture of black pepper, garlic powder, and onion powder to taste.)
Cook until the onion is tender and the sausage is cook through. Remove from heat.
Lay* crescent rolls out on a baking sheet (I use a stoneware baking sheet)
*I have found that it works best to unroll the crescent roll in a long sheet and then press all of the seams together to create a large area.  After the filling is placed down the center, use a knife to slice "tabs" to pull up and "tie" on top of the braid.  This method has given me the most room for filling :)
After your crescent roll is laid out, place a layer of cheese on top of it.
Next, spoon your filling along the center on top of the cheese.
Top with more Cholula and cheese.
Fold your crescent roll "tabs" up and press together.
Bake at 350 degrees for 15-20 minutes or until golden brown.
Enjoy!  As always, please leave your comments :)


Cream Cheese Frosted Lemon Cake with Lemon Glaze

I love lemons!  Really I do, I do, I do!!!  If they had a 12 step program for lemonade addicts I would be a member.  So now that it is spring I thought I would whip up some cupcakes with one of my favorite foods.  These are sinfully good!  I jokingly call these the diabetic coma cupcakes-they are so good you might not be able to eat just one.  Enjoy!!!

If you do not have time to make a lemon cake from scratch, any lemon boxed cake will do.  Just bake cake according to directions on the box and let cool.  This is what I did for these cupcakes.  However normally I make this into a cake using the recipe below.  Either way the result is yummy!

Lemon Chiffon Cake-Betty Crocker

2 cups flour (all-purpose)
1 1/2 cups sugar
3 tsp baking powder
1 tsp salt
3/4 cup cold water
1/2 cup veg oil
2 tsp vanilla
1 TBSP grated lemon peel
7 large egg yokes
1 cup large egg whites
1/2 tsp cream of tartar

1. Move rack to lowest position. Heat oven to 325 degrees.
2. Mix flour, sugar, baking powder and salt in large bowl.  Beat in water, oil, vanilla, lemon peel and egg yokes with electric mixer on low speed until smooth.
3.  With clean beaters, beat egg whites and cream of tartar in large bowl with electric mixer on high speed until stiff peaks form.  Gradually pour egg yolk mixture over beaten egg whites, folding in with rubber spatula just until blended.  Pour into ungreased angel food cake pane, 10 X 4 inches.
4.  Bake about 1 hour 15 minutes or until top springs back when touched lightly.  Immediately turn pan upside down onto heatproof funnel or bottle.  Let hang about 2 hours or until cake is completely cool.  Loosen side of cake with knife or long metal spatula; remove from pan.


Cream Cheese Frosting

8 ounces cream cheese
1/4 cup butter softened
2-3 tsp milk
1 tsp vanilla
4 cups powdered sugar

Mix with electric mixer on medium speed until smooth.  Cool leftovers in refrigerator.


Lemon Glaze

1/3 cup butter
2 cups powdered sugar
4 Tablespoons lemon juice
1/2 tsp grated lemon peel

Whisk together in medium bowl.


Once your cupcakes are cooled frost with cream cheese frosting.  Once frosted turn cupcake upside down and dip into glaze.  Let stand on counter for 10 minutes to set before storing in refrigerator.  If in angle food cake form, frost entire cake.  Pour glaze over the top of cake allowing the glaze to drip over onto the sides.  Let stand on counter for 10 minutes to set.  Store in refrigerator. 

Slow Cooker Enchilada Soup

I just LOVE slow cooker meals and this one is super yummy!
Thank you to the Dainty-Chef for this recipe!


Ingredients:
3 tbsp butter
3 tbsp flour
1/2 cup chicken broth
2 cups milk
1 can (15 oz.) black beans, rinsed and drained
2 cans (10 oz. each) Rotel diced tomatoes and habaneros (or another flavor if you prefer less spice)
2 cups corn (fresh or frozen)
1 diced yellow or white onion
1 diced red pepper
1 can (10 oz.) Enchilada sauce
6 boneless chicken thighs (I used frozen)
Toppings:
Cheese (any type - I used Cheddar and Monterrey Jack)
Olives
Green Onions
Avocado
Cilantro
Sour Cream
Crushed Tortilla Chips

Directions:
Whenever I cook in my slow cooker, which is every week, I ALWAYS use Reynolds Slow Cooker liners.  They are worth every penny and don't cost that many!
First put your slow cooker liner into your slow cooker :)
Next, combine beans, Rotel, corn, onion, and bell pepper together in your slow cooker.
Place your chicken on top.
In a saucepan, melt butter.
Whisk in flour, stirring constantly until smooth and bubbly.  Remove from heat.
Add chicken broth and 1/2 cup milk - whisking constantly to keep smooth.
Return to the heat.  Bring sauce to a gentle boil.  Stir constantly until it thickens. Remove from heat.
Stir in enchilada sauce.
Gradually stir in remaining milk.  Stir until smooth.
Pour over ingredients in the slow cooker.
Cover and cook on low for 6-8 hours or high for 3-4 hours.
Before serving, remove chicken and cut or shred.  I put my chicken into a bowl and used 2 forks to shred it.
Return shredded chicken to the soup and mix well.
Serve with any of the desired toppings listed above and let me know if you come up with other great toppings!


Habanero Apricot Jam-Salsa!

Seriously Yummy!  
This is one of the best things I have EVER made and eaten!!!  
This is a must try recipe!
Habanero Gold Jelly

Ingredients:
1 cup diced, dried apricots
2 1/4 cups white vinegar
3/4 cups finely diced red onion
3/4 cups finely diced red pepper
3/4 cups finely diced habanero (including seeds)
9 cups sugar (I use evaporated cane sugar)
3 pouches liquid pectin

Directions:
Dice apricots and measure into a large, deep stainless steel pot with white vinegar.  Let stand for 4 hours.
Meanwhile, dice onion, seeded red pepper, and habanero with seeds.
After 4 hours, add onion and peppers to the apricots.  Stir in sugar.
Heat on high until it boils.  Stir constantly!  Boil hard for 1 minute.  Remove from heat.
Immediately stir in pectin.  Mix well.
Pour jelly into mason jars dividing solids equally among jars.
Close lids.  Process 10 minutes.
Cool upright until lids pop - about 30 minutes.
When lids have popped but jelly is still hot, carefully and slowly invert, twist and rotate jars to disperse solids.  Repeat as necessary until solids stay suspended in jelly.
Makes 6 pints.

To Eat :)
**Pour over cream cheese and serve with crackers, tortilla chips, or baguette bread.
** Pour over chicken (or another meat) and bake- recipe to come!
**Please share your recipe ideas with me!!!

Do It Yourself Coat Hooks


All you need:
1 piece of MDF (buy at any local building supply store like Home Depot.)
Paint (any color)
Paint for lettering or Vinyl Lettering
Clear Finish (I use a poly base - optional)
cabinet hardware
drill
screwdriver


Directions:
Cut your MDF to size (if you aren't comfortable cutting it yourself, your store should cut it for you free of charge.)
Next, paint the base color on the MDF.
When the paint is dry, paint the letters or apply the vinyl lettering.
After the letters are dry, apply the clear coat and let it dry.  You don't have to use a finishing coat.  I always apply one on things that get used because they hold up better during and throughout use.
Using a drill, drill enough holes along the bottom part of the MDF for your hardware.  I first marked them out with a pencil and ruler, so they were evenly spaced and in a straight line.
Next, simply attach the cabinet handles.
Hang and enjoy!
 Our coat hooks hold a lot, but it really depends on how well you hang it on the wall!


I would love to hear your ideas about this project and if you do it, I would love to see pictures!
Happy crafting!

Tuesday, March 20, 2012

Jamaican Jerk Rub


 Ingredients:
3 tbsp brown sugar
3 tbsp paprika
1 tbsp cinnamon
1 tbsp salt (optional if you prefer sodium free)
2 tsp ginger
1 tsp allspice
1 tsp cayenne pepper (I usually use a heaping tsp)
3/4 tsp nutmeg
3/4 tsp black pepper

Combine all ingredients and store in an airtight container.

Jamaican Jerk Chicken Nachos

These nachos are AMAZING!

Ingredients:
6 cups tortilla chips
3 cups diced chicken
2 cups shredded cheddar
2 tbsp plus 2 tsp Jamaican Jerk Rub(you can buy a prepared Jerk or you can use my recipe below)
1 red bell pepper
1/2 cup drained and rinsed black beans
1 lime
2-3 tbsp of minced fresh cilantro
1/4 -1/2 cup sour cream

Directions:
Dice and cook chicken.  I use my George Foreman to cook the chicken and then my kitchen scissors to cut it directly into the bowl because I HATE touching raw, thawed chicken!!
Next, combine cheese, chicken, and 1 tbsp of the Jamaican Jerk Rub and set aside.
Spread a layer of tortilla chips onto your baking sheet (I use my stoneware baking sheet.)  Sprinkle the chicken mixture evenly over the chips.
Bake at 350 degrees for 10-15 minutes or until the cheese is melted.
Dice the red pepper and place into a small bowl.
Rinse and drain a can of black beans.  Add 1/2 cup (or however much you prefer - I usually add about the same amount as red pepper.)
Juice 1/2 of the lime into the bowl with the red pepper.
Add 1 tbsp of the Jerk ruband mix well.
Place the cilantro into a small bowl.  Using kitchen scissors, mince the cilantro.
Spoon the bell pepper mix over the nachos.  I like to pour the remaining lime juice and seasoning over them as well - it doesn't make them soggy.
Sprinkle the cilantro evenly over the nachos.
Combine sour cream and 2 tsp of Jerk rub in a zip top bag.  Close the bag and squish (a technical cooking term) the bag to mix.
Cut a small corner off the bag and pipe the sour cream mixture over the nachos.  Garnish with lime slices. 
We squeeze the additional lime wedges onto the nachos when we are eating them.  Yummy!
The original recipe is from Pampered Chef - I have modified a couple of things :)

Jamaican Jerk Rub:
 Ingredients:
3 tbsp brown sugar
3 tbsp paprika
1 tbsp cinnamon
1 tbsp salt (optional if you prefer sodium free)
2 tsp ginger
1 tsp allspice
1 tsp cayenne pepper (I usually use a heaping tsp)
3/4 tsp nutmeg
3/4 tsp black pepper

Combine all ingredients and store in an airtight container.


Monday, March 19, 2012

Bacon, Egg, and Cheese Toast Cups

These were a hit at my house!  How can you go wrong with those ingredients?!
I found this idea on thenoshery.com

Ingredients:
eggs
shredded cheese (any type - I used cheddar)
bacon
bread
butter
salt and pepper
Cholula (the greatest sauce EVER, but it is of course optional!)

Directions:
Using a biscuit cutter (or anything else that will cut a 3 or 4 inch circle) cut your bread slices into circles.
The original recipe said to simply press the circles into a muffin pan sprayed with cooking spray; however, we found that they turned out much too dry this way.  After your circles are cut, spread butter on both sides and press into your muffin pan.
Next, cook bacon (I cook mine in a ridged stoneware pan in the microwave.)  Be sure it doesn't get too crispy because you will need to be able to wrap it around the inside of the toast cup.
Place bacon strips, one per cup, into the toast cups.
Fill with about 1 tbsp of cheese.
Bake at 400 degrees for about 5 minutes, allowing bacon to cook a little more.  Remove from oven.
Crack your egg (you will have to separate out much of the egg white; otherwise it won't fit.)  Drop eggs into the cups, sprinkle with salt, pepper and Cholula to taste.  Place back into the oven and cook until egg white begins to set, about 8-12 minutes (depending on how much egg white.)  The yolk should be creamy.
Enjoy and let me know if you have any other tips!

Sticky Bun Breakfast Ring

This was so easy and my family LOVED it!  I found this recipe from The Jones Way.

Ingredients:
2 tubes of buttermilk biscuits 
(I used the large biscuits and had a total of 16 - the original recipe used smaller biscuits.)
6 tbsp. melted butter
1 cup maple syrup
2/3 cup packed light brown sugar
1 tsp. cinnamon
*1/4 - 1/2 cup chopped pecans or almonds *optional
**I have doubled the topping recipe because mine had 4 more biscuits - you may not need as much if you have smaller or fewer biscuits.)

Directions:
The original recipe called for a fluted pan; however, I do not own a fluted pan, so I used my 10 inch round cake pan, and it worked perfectly!
Spray pan with cooking spray and set aside.
Mix melted butter and syrup together and set aside.
In another bowl, mix the brown sugar, cinnamon, and nuts (if desired.)
Place about 1/2 syrup mixture into the bottom of the pan.
Sprinkle about 1/2 of the brown sugar mixture on top of the syrup mixture.
Lay the biscuits in the pan overlapping the edges forming a ring.
Pour the remaining syrup mixture and brown sugar mixture over the biscuits.
Bake at 375 degrees for 20-30 minutes (baking times depend on how many biscuits and the size of the biscuits.)  It is done when it is golden brown.
Remove from oven and let cool in pan for about 1 minute, then invert onto a platter.  
Enjoy!!


Friday, March 16, 2012

St. Patrick's Day Breakfast

Hello there Lads and Lassies!  I hope you are all having a blessed day!  Today I am sharing a fun breakfast for the kids.  This could also be great for an April Showers Brunch. 
Rainbow pancakes, Rainbow Kabobs, Fruit dip, Lime punch.
Served with bacon and eggs(not pictured) 

pancakes topped with huckleberry syrup
Rainbow Pancakes
Add any food coloring to your normal pancake batter.  I used Bisquick and Wilton coloring paste.

Rainbow Kabobs
Strawberries or Raspberries
Oranges(I used cuties)
Pineapple
Kiwi
Blueberries
Grapes

Fruit Dip
8 oz cream cheese softened
1 container marshmallow creme
1/4 cup crushed pineapple
Stir together, chill then serve with favorite fruit

Green Punch
Lime Sherbet
7-UP
This punch recipe works with any Sherbet flavor so if you are not keen on lime try another variety.  Our favorite is Raspberry.

*The kids loved helping make the kabobs!  I feel it is so important to get kids in the kitchen to help prepare meals!  Great memories are always made!


Wednesday, March 14, 2012

Apple Ring Fun-And Yum

Being a homeschool mom of 4 growing kiddos all day long I hear, "MOM, I'M HUNGRY!"  
Today I thought I would share our favorite after school snack-Apple Rings.
What you will need:
Your favorite type of chilled apple(we use Fuji)
Apple corer
Peanut Butter/ Nutella
Toppings
Napkins 
Some of our favorite toppings include:
Raisins
chocolate chips or other flavored chips
sprinkles
marshmallows
graham cracker or granola crumbles
As you can see my son Dillon loves the marshmallows!

Being the person who makes the least amount of mess, I always am the one who spreads the peanut butter or nutella on the apple before letting the kiddos decorate their own edible masterpiece.  ENJOY!

***Evan tidbit and shopping tip***
If something can have sprinkles, it should have sprinkles!
Sprinkles can be very expensive, especially holiday themed ones.  I have found that my boxed grocery store carries bulk sprinkles, even holiday ones leftover from the doughnut decorating and sells them about 90% cheaper than they would normally be.  Often times if the store does not have them on a shelf for sale, they will package some for you.  The bakery will often times do this for all their special baking goods like cake fillings.  So check it out!  I have a tub entirely devoted to sprinkles from the boxed store-time to join a 12 step program :)

Monday, March 12, 2012

OH MY!! Banana Cream Pie!!

I love myself a good piece of pie!  I had some bananas on the counter that were just about past their prime so we decided to whip up this little beauty.  Though I did change a few steps, this recipe originates from the food network.  Sorry, I don't remember which show I copied it from.  This is a super easy recipe that is over the top yummy! 
Graham Cracker Crust:
1 3/4 cups graham cracker crumbs
1/2 teaspoon cinnamon
big pinch of salt
6 tablespoons melted butter
1 teaspoon water
sugar
Heat over to 325.  Lightly butter a deep 9 or 10 inch pie pan.  In a large mixing bowl combine the graham cracker crumbs, cinnamon, and salt.  Stir briefly.  Stir in melted butter and water.  Press into the bottom of the pie pan.  Lightly sprinkle sugar over crust.  Bake on center rack for 8 minutes, then cool on wire rack while you prepare the filling.
 Vanilla Pudding Filling:
3/4 cup plus 2 tablespoons sugar
1/4 cup plus 2 tablespoons cornstarch
1/8 teaspoon salt
3 cups half and half or whole milk
3 egg yolks
2 tablespoons butter cut in pieces
2 teaspoons vanilla extract
Combine the sugar, cornstarch, and salt in nonstick medium saucepan and whisk until combined.  Then whisk in milk and egg yolks.

 Heat pudding over medium heat, stirring continuously  until it thickens and bubbles, about 5 minutes.  Continue cooking the mixture for 1 more minute, whisking all the while to keep it from boiling.  Remove the pan from heat and add  butter then vanilla.  Pour filling into pie pan.
 Gently press a piece of plastic wrap against the filling.  Careful the filling is hot!  Let cool on wire rack for 20 minutes.  Then chill for at least 6 hours in refrigerator.
 Once chilled, remove plastic wrap.  Slice desired amount of bananas over pie filling.  I used 4-5 medium bananas.
 Spread cool whip over the bananas.

Top off with shaved chocolate or chocolate chips.

Serve and enjoy.  Store leftovers inside covered dish in refrigerator.

**A big thanks to my 9 year old Isabel for photographing today's post!***